
Chapter 1 of 15
Getting started
First steps with AppAlbania Host: what you bought, your account and the hosting panel, one-click sign-in and where everything is.
In this guide
This chapter explains what your hosting includes, how to open the panel and where to find each tool. Read it once at the start; the rest of the manual covers the tools one by one.
What you bought
You have a managed WordPress hosting plan. After you pay by card, the system automatically creates your hosting account and your WordPress site with the domain and site title you entered at signup. The welcome page and the welcome email contain the DNS instructions for connecting your domain.
To see what each plan includes, check the plans.
Your account and the hosting panel
You will work in two different places:
- Your account at
host.appalbania.com/account— here you manage your plan, invoices, card, support tickets and profile. The account is available in Albanian and English. - The hosting panel at
panel.appalbania.com— here you manage the site itself: WordPress, SSL, cache, security, backups, files and configuration. The panel is in English.
Open the panel with one click
- Go to
host.appalbania.com/loginand sign in with your email and password. - In the top right, click the red Open hosting panel button.
- The panel opens and you are signed in, with no second password (this is called single sign-on).
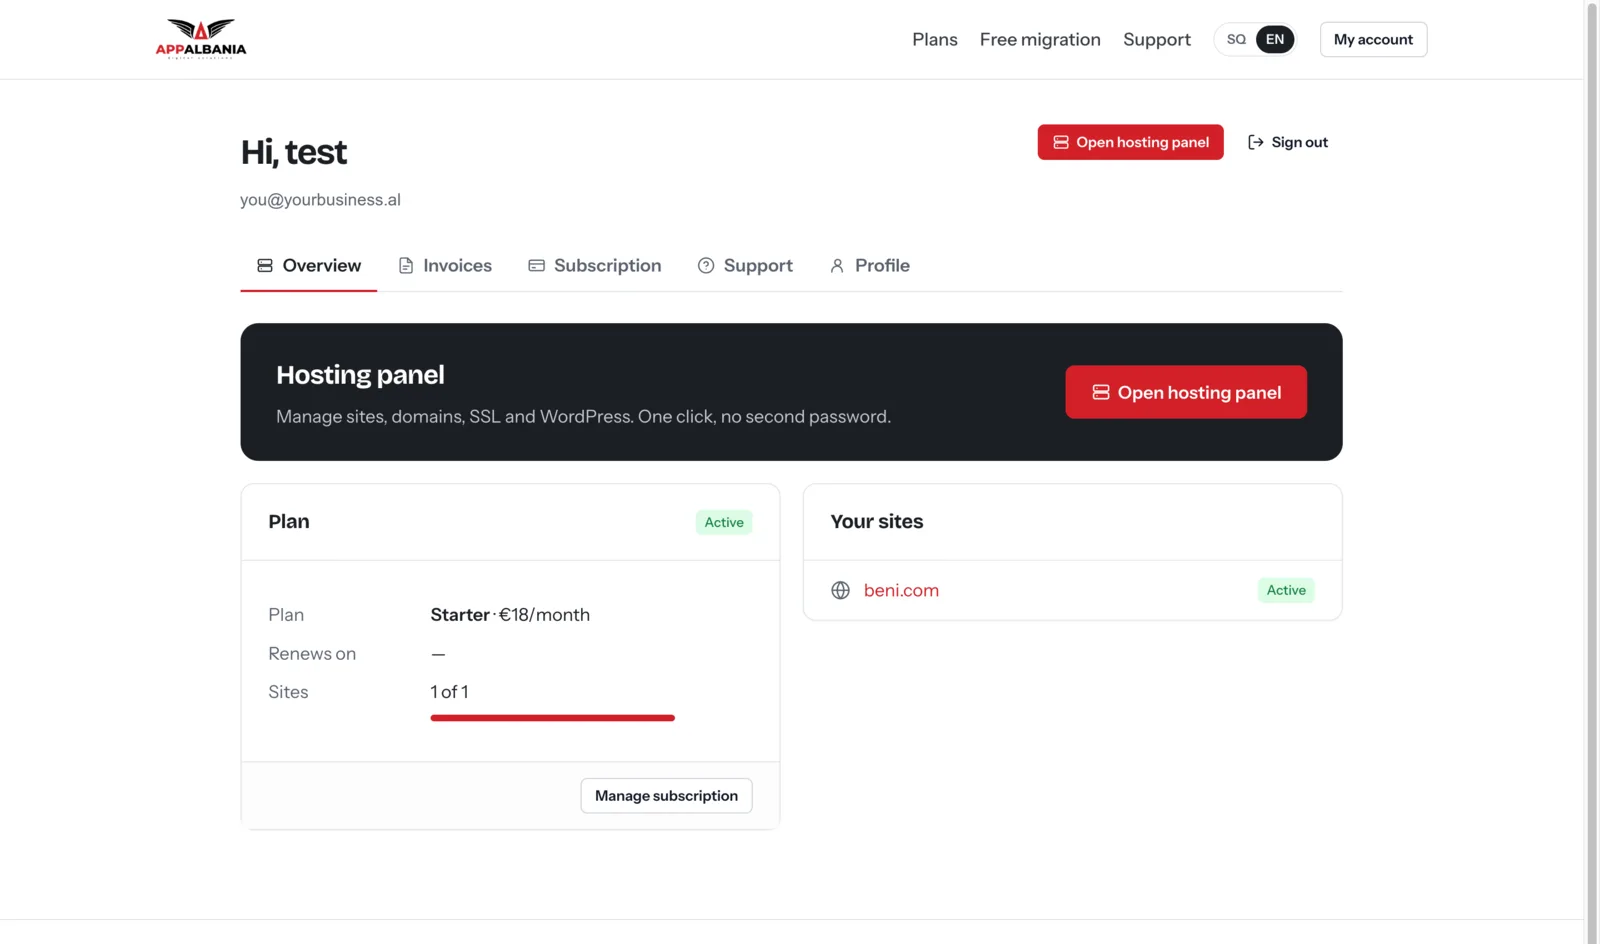
The panel also has a direct address (panel.appalbania.com), but for older accounts it uses a separate password. Always use the button in your account.
The Sites list
After signing in you see the Sites list. For each site it shows the domain, the PHP version (the language WordPress runs on), the WordPress version and the status. From here you can also run bulk actions: Update all plugins, Update all themes, Update core and Update everything.
Click your site to open it. The top bar has three buttons:
- Visit Site — opens the public site.
- WP Admin — signs you into the WordPress admin with one click.
- Actions — other actions for the site.
The Overview page
Overview is the site summary. Under Application you see: the domain, HTTPS (Enabled/Disabled, meaning whether the site has an SSL certificate), Page caching, Maintenance mode, Multisite, the PHP version, Web directory (the site folder), the creation date and the Helper plugin.
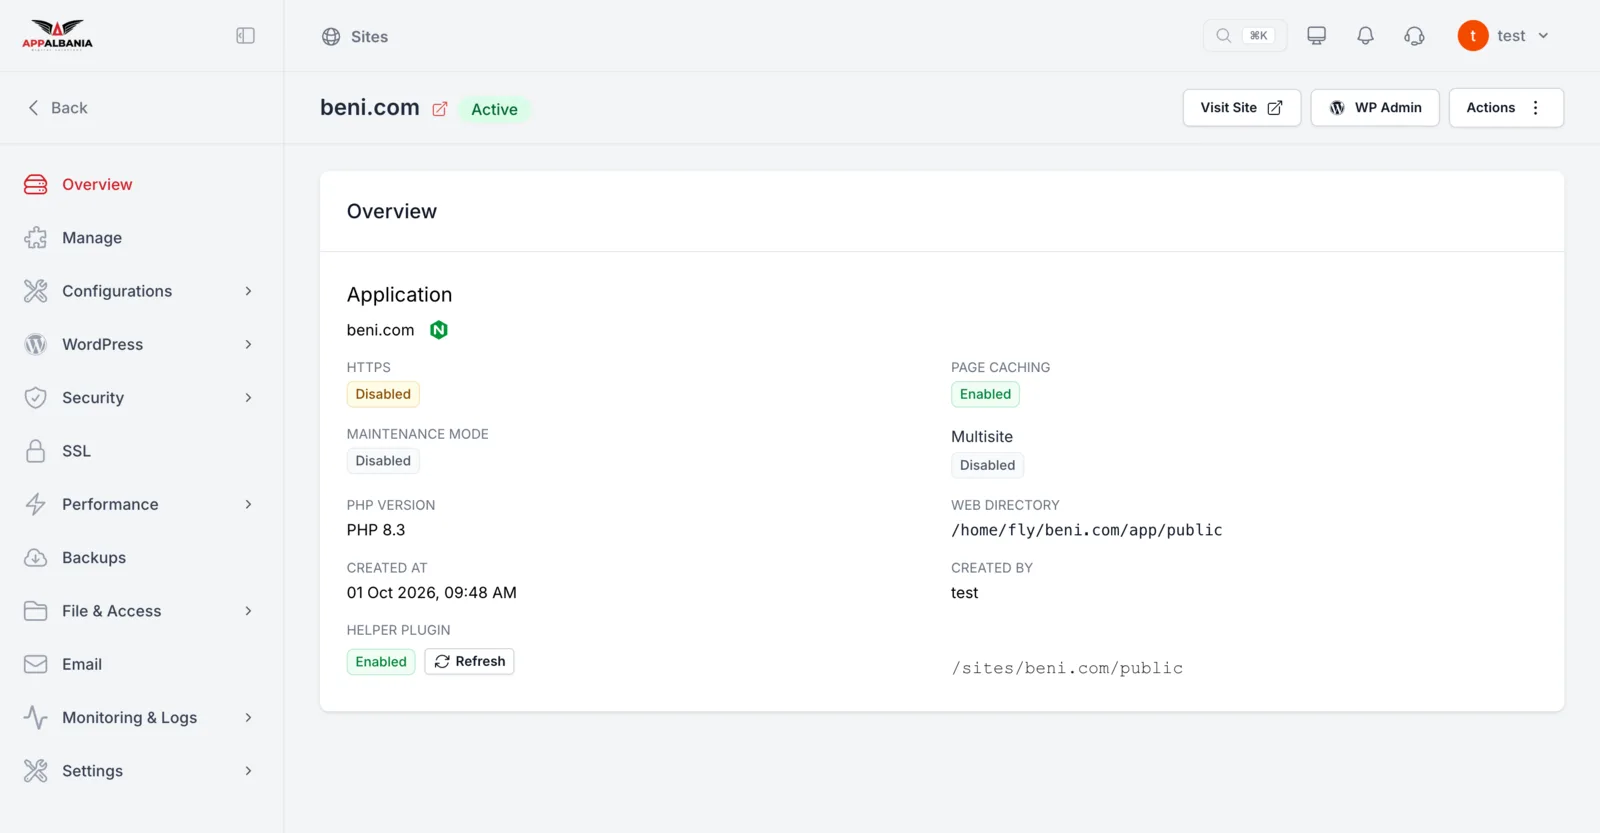
Map of the sidebar
| Menu | What you do there | Chapter |
|---|---|---|
| Manage | Fix file permissions, restart services, view database credentials | Troubleshooting |
| Configurations | WP Config, PHP, Nginx | Configurations |
| WordPress | Updates, plugins, themes, users | WordPress |
| Security | Firewall, vulnerability scanner, integrity checker | Security |
| SSL | HTTPS certificates | SSL |
| Performance | Cache, Redirect Rules, Performance Monitor | Speed |
| Backups | Backups to storage you own | Backups |
| File & Access | File Manager and SFTP | Files |
| Email sending from WordPress (SMTP) | ||
| Monitoring & Logs | Error and access logs | Troubleshooting |
| Settings | Domains, Maintenance Mode, Cron | Domain and DNS |
Recommended first steps
- Point your domain to the hosting — see Domain and DNS.
- Once the domain points to the site, install the free certificate under SSL → Let's Encrypt — see SSL.
- Add backup storage — see Backups.
- Turn on two-factor authentication in your account — see Your account.
For a longer walkthrough, read getting started with WordPress hosting. If you have an existing site, you can request a free migration.
Need help? Open a ticket at support.